Unscrew the three h shaped clips. Reprap darwin wiring guidediagram january 05 2008 0650pm registered.

Diy Reprap 3d Printer For Beginners P2 Wire
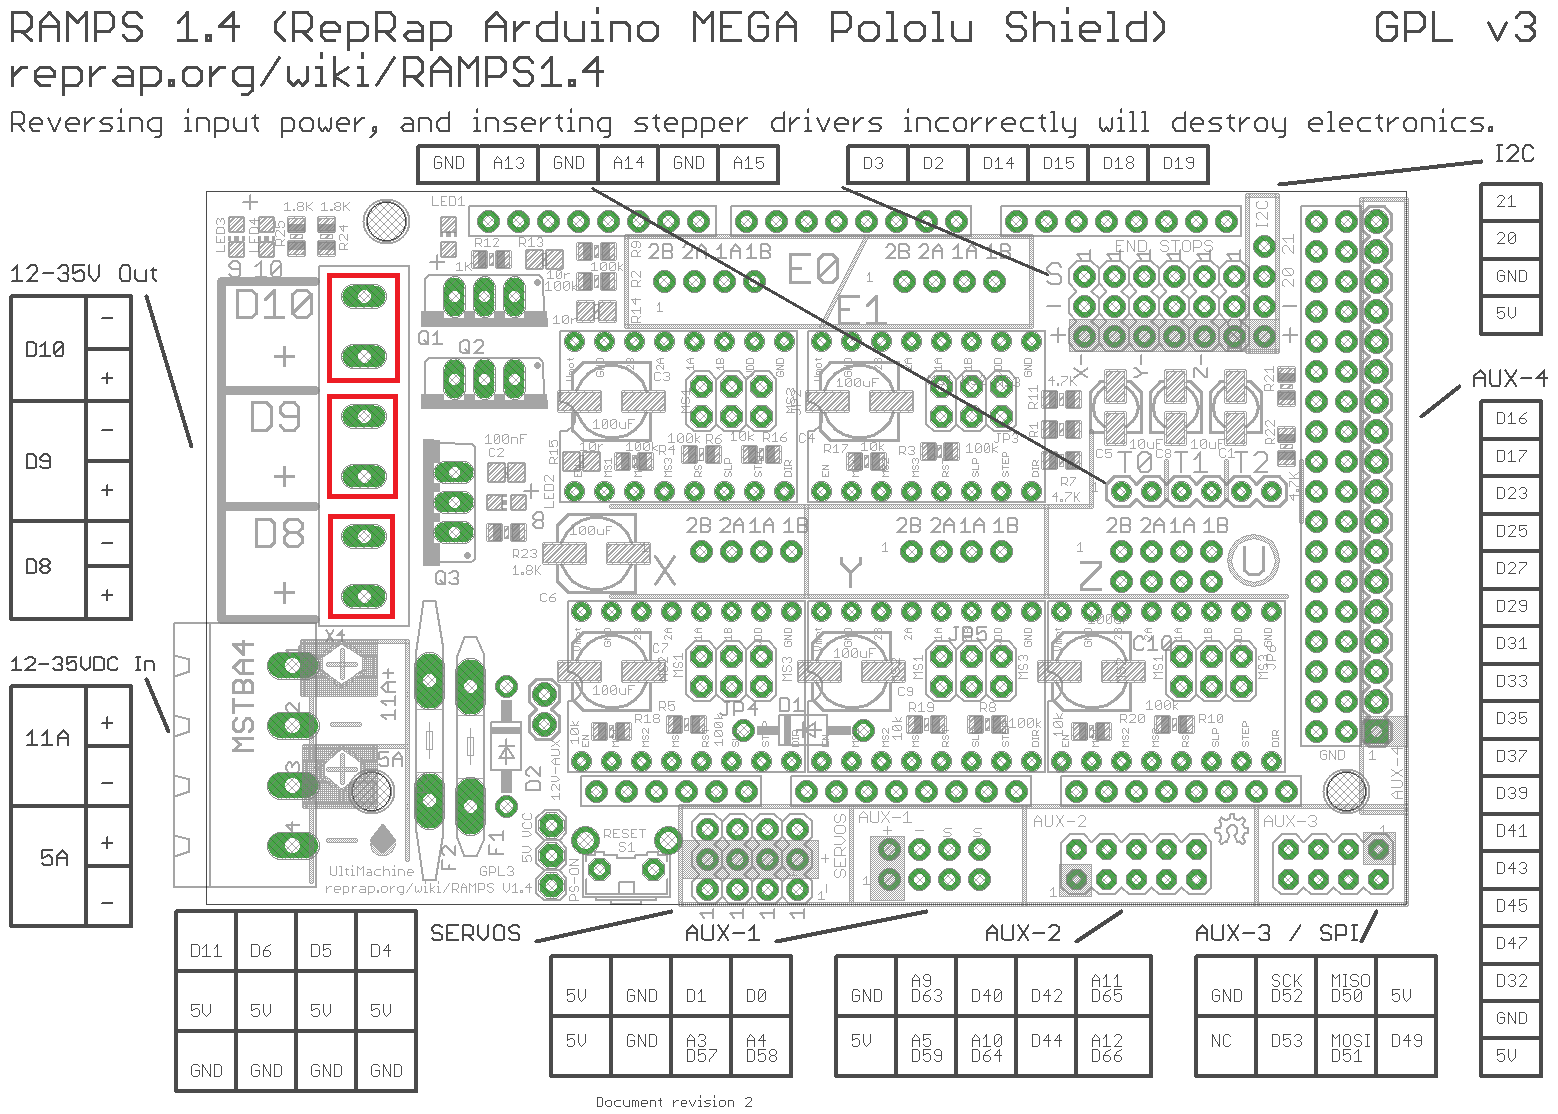
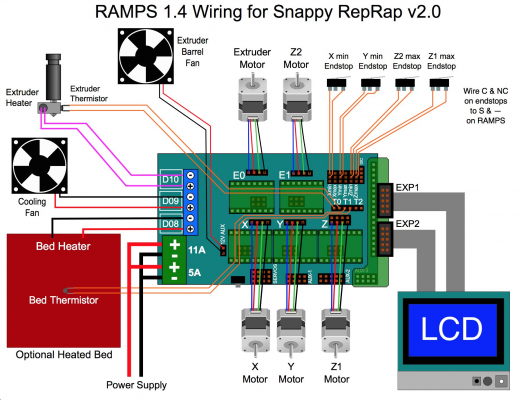
Reprap wiring diagram. I was hoping someone could link me to the darwin version of the wiring guide. Bare the high current wire ends and split each end in two equal halves. Ramps 14 wiring diagram ramps 14 wiring diagram reprap ramps 14 wiring diagram every electric structure is composed of various unique parts. Reprap wiring diagram wiring diagram is a simplified conventional pictorial representation of an electrical circuit. The latest version is in the reprap subversion repository here but that may be an unstable version in development. Twist those halves separately.
Solder the two from the plain wire the 12 volt wire to pins 2 and 3. Each component should be set and connected with different parts in particular way. In the diagram above multi way connections are shown as thick lines with a number next to them. Otherwise the arrangement will not function as it should be. 7 hi all i am in the process of building a darwin reprap based around the documentation. Reprappro mendel works equally well with levered and un levered microswitches.
The pin numbers are embossed on the plug. The wiring diagram is stored as an eagle schematic in your download at mendelelectronicemendel wiring diagramsch. You will probably find it easiest to connect the wires to the endstops with them removed from the machine. 12 years ago posts. Solder the two from the wire with the black stripe the ground gnd wire to pin 1 and the plug shell tab. The diagram shows a switch with a lever.
It shows the components of the circuit as simplified shapes and the capacity and signal friends in the midst of the devices.
Gallery of Reprap Wiring Diagram